I decided to get the neck cut down to its final shape before tackling the fretboard. Before I can do that, I need to get the headstock veneer glued on.
I've got a sheet of ebony that I'll be using as the headstock veneer. It's got a few nice ripples of lighter grain, so I'm not sure if I'll dye it black or not yet (a real Gibson uses dyed holy veneer), but in any case it was too thick and needed thinning out.
I glue / taped it to the bench and attacked it with scrapers:
Sandpaper:
and eventually a power sander until it was about 1mm thick:
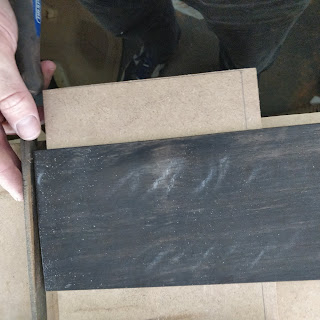
Then I needed to put a straight edge onto one of the sides since it will eventually butt up against the nut. I ran a bit of chalk accross one edge:
And gently (as it's now quite thin) filed it down:
The chalk lets you easily see which bits have been touched by the file, so indicates when you've got a straight edge all the way accross. We can see here that we're about half way:
After a little bit more filing, there's just a little bit of chalk left on the right:
Which, once removed yields a completely straight edge on the veneer:
The veneer will lay on the headstock, which is at an angle (not 90 degrees) to the side of the nut. Therefore you need to file a little angle into the side of the veneer so it butts up neatly.
You can't really see it in the photo, but the edge of the veneer now makes an angle of 90 degree angle with the fretboard / neck. This means that the nut will butt nicely up to the veneer.
You can also see what the volute is starting to look like in the picture above.
Before I could attach the veneer, I needed to flatten and smooth out out the headstock. I had't really addressed this since gluing the skarf joint, but you can see below that it was a bit rough (covered with chalk to help even sanding):
In particular, even when the surfaces were sanded clean, the joint line was still very visible:
After a little work, however, the joint became smooth.
It's never going to be an invisible joint, as there is different grain either side of it, but it is nice and flat now. If it had been left, you'd have been able to see it on the side of the guitar between the mahogany and the veneer.
I dry clamped the veneer, having drilled holes for two locating pins to stop it moving around once the glue is applied:
The MDF block on the right is superglue / taped down to the neck along the line of the angle break between the headstock and neck. It's there so that I have something to position the veneer up against while it's clamped.
I applied the glue (it was properly spread before use):
And clamped - good glue squeeze out all around the joint indicates that there's good clamping pressure all the way around:
And here's the veneer at the nut end:
I'll leave it to cure overnight. Next up will be to shape the neck. I'll also have to get some tuners before holes for them can be drilled. .


No comments:
Post a Comment