Sunday 16 December 2018

Headstock Shaping


Here's the headstock from last week, unclamped. 


The eagle eye'd will notice that it's currently impossible to access the adjusting head of the truss rod, so we need an access hole of some sort through the veneer. I drilled a small hole in the veneer through to the truss rod channel underneath, and gradually enlarged it with bigger drill bits:


 Then, working with files, I got it in shape so that the truss rod would fit underneath the veneer:


Once covered, the adjuster hole will not be visible:


I then spent a little time finessing the edge of the new hole to smooth it out. This is good enough for now, I'll revisit when the guitar is finished sanded in a few months time:


The picture below illustrates the access when the truss rod is in position:


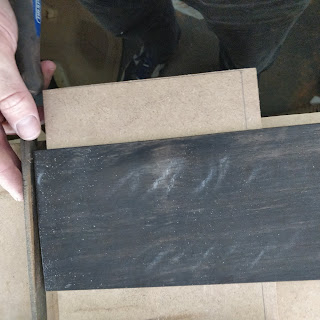
Next I moved onto shaping the headstock. I decided to make a template for the headstock from using my neck template. It was glued / taped to a piece of thick stock MDF:


And after a few minutes on the robosander, we have a finished template:


It's key to make sure this template is aligned properly - else you'll end up with a wonky head on the guitar. I spent a long time measuring and centring the template,


Even busting out the Frickin' Laser Beam to check it:


I could align the neck relative to the Frickin' Laser Beam, then align the headstock template so that the laser went straight down the middle of that as well:


The headstock template was glued, then screwed down to the headstock. The screws are located where the tuner's will go eventually, so the holes will not be seen. We took a trip to the robosander:


 And after a while, we're half done:


I left a lot of material on the neck blank to be removed by the robosander, and it was pretty slow going. I had a go with my other drill tool - the Microplane Rotary Shaper. It's a terrifying thing when up to speed. The robosander doesn't hurt too much if you accidentally scrape it, but this thing looks like it would tear out chunks:


It leaves chips rather than dust, which is nicer in the workshop:


And doesn't leave as smooth a finish. However, it removes a lot of material, quickly:


I switched back to the robosander, and finished off the headstock:


Here's the finished product:


And from the side:


There's a little more shaping needed on the top edge in the centre to match the LP style that I'm going for. The follower bearing on the sander lacks the resolution to shape them so I'll do those by hand later on. 

Saturday 8 December 2018

Attaching the headstock veneer

I decided to get the neck cut down to its final shape before tackling the fretboard. Before I can do that, I need to get the headstock veneer glued on.

I've got a sheet of ebony that I'll be using as the headstock veneer. It's got a few nice ripples of lighter grain, so I'm not sure if I'll dye it black or not yet (a real Gibson uses dyed holy veneer), but in any case it was too thick and needed thinning out. 

I glue / taped it to the bench and attacked it with scrapers:


Sandpaper:


and eventually a power sander until it was about 1mm thick:


Then I needed to put a straight edge onto one of the sides since it will eventually butt up against the nut. I ran a bit of chalk accross one edge:


 And gently (as it's now quite thin) filed it down:


The chalk lets you easily see which bits have been touched by the file, so indicates when you've got a straight edge all the way accross. We can see here that we're about half way:


After a little bit more filing, there's just a little bit of chalk left on the right:


Which, once removed yields a completely straight edge on the veneer:


The veneer will lay on the headstock, which is at an angle (not 90 degrees) to the side of the nut. Therefore you need to file a little angle into the side of the veneer so it butts up neatly.

 I took a few pictures, but they didn't come out at all - here's the best of them:


You can't really see it in the photo, but the edge of the veneer now makes an angle of 90 degree angle with the fretboard / neck. This means that the nut will butt nicely up to the veneer.

You can also see what the volute is starting to look like in the picture above.

Before I could attach the veneer, I needed to flatten and smooth out out the headstock. I had't really addressed this since gluing the skarf joint, but you can see below that it was a bit rough (covered with chalk to help even sanding):


In particular, even when the surfaces were sanded clean, the joint line was still very visible:


After a little work, however, the joint became smooth.


 It's never going to be an invisible joint, as there is different grain either side of it, but it is nice and flat now. If it had been left, you'd have been able to see it on the side of the guitar between the mahogany and the veneer.

I dry clamped the veneer, having drilled holes for two locating pins to stop it moving around once the glue is applied:


The MDF block on the right is superglue / taped down to the neck along the line of the angle break between the headstock and neck. It's there so that I have something to position the veneer up against while it's clamped.

I applied the glue (it was properly spread before use):


And clamped - good glue squeeze out all around the joint indicates that there's good clamping pressure all the way around:


And here's the veneer at the nut end:


I'll leave it to cure overnight. Next up will be to shape the neck. I'll also have to get some tuners before holes for them can be drilled. . 


Sunday 2 December 2018

Headstock thickness and volute

We left the neck tenon looking like this:


The blue veneer adds a little thickness to the tenon, making the joint tighter. I trimmed and sanded it back flush:


And marked the tenon with chalk. This way, once the tenon is inserted into the neck pocket, you can see which parts touch, as it rubs the chalk away slightly:


Not sure if you can see this, but the picture below shows the tenon after the joint was put together. You can see (possibly) the lines in the chalk where the joint got stuck, so which part needs a bit of sanding away.


Eventually, the joint becomes tight. It now requires a little pressure to put it together. 


Close up there's still a little gap on the side. The neck is still oversize, having not been bought down to its final width. I'll address this gap once that's done:


There's an internet myth that the joint needs to be so tight that it needs hammering or clamping together. If it's that tight, it will squeeze all the glue out as it's bought together. In addition, once glue is put on the woods, they'll expand slightly which will make a joint that's already very tight even more difficult to put together. If the joint is tight enough to support its own weight - that's good enough:


I break out the Frickin' Laser Beam to check the alignment of the neck:


With the beam set up along the centre line of the body:


It pretty much exactly hits the centre line at the nut:


This is the end of the neck pocket / tenon work. The neck is straight on the body and at the correct neck angle. While there's a lot of work left on the neck, there's relatively little left that's all that intimidating or risky to do.

The next job is to get the headstock thickness sorted out. The final thickness needs to be 15mm, including a veneer of about 1mm. I mark the 14mm thickness of the mahogany needed:


And glue it down to the bed of a router sledge.


I'll make lots of little passes (the first is shown in the picture) until the final thickness is achieved:


Finally, the desired thickness - with a bulk of material left behind the nut where the volute will be carve from:


I make a little paper template with the shape of the volute in it. I'll use this as a visual aid on the robo sander:


And gently free hand the robo sander to get down to the required shape:


Until:


The headstock in that picture still looks really thick! It's much thinner, just the picture was taken at an angle...

I'm not sure what the next job will be, though we're getting close to the point where we need to start thinking about putting a radius on the fretboard. As usual, I'll try and put that off as long as possible, as it's the absolute worst job in the whole of guitar building.