Wednesday, 6 January 2016

Telecaster build - inlay dots

Compared to the fretboard shaping, this is a nice job. 

I used my homemade mould (a bit of aluminium bar with six and two mm holes drilled in it) to make some clay dots and side dots. I use Fimo modelling clay - the colour is 'light flesh':


Once they're cooked and popped out they're ready to be used:


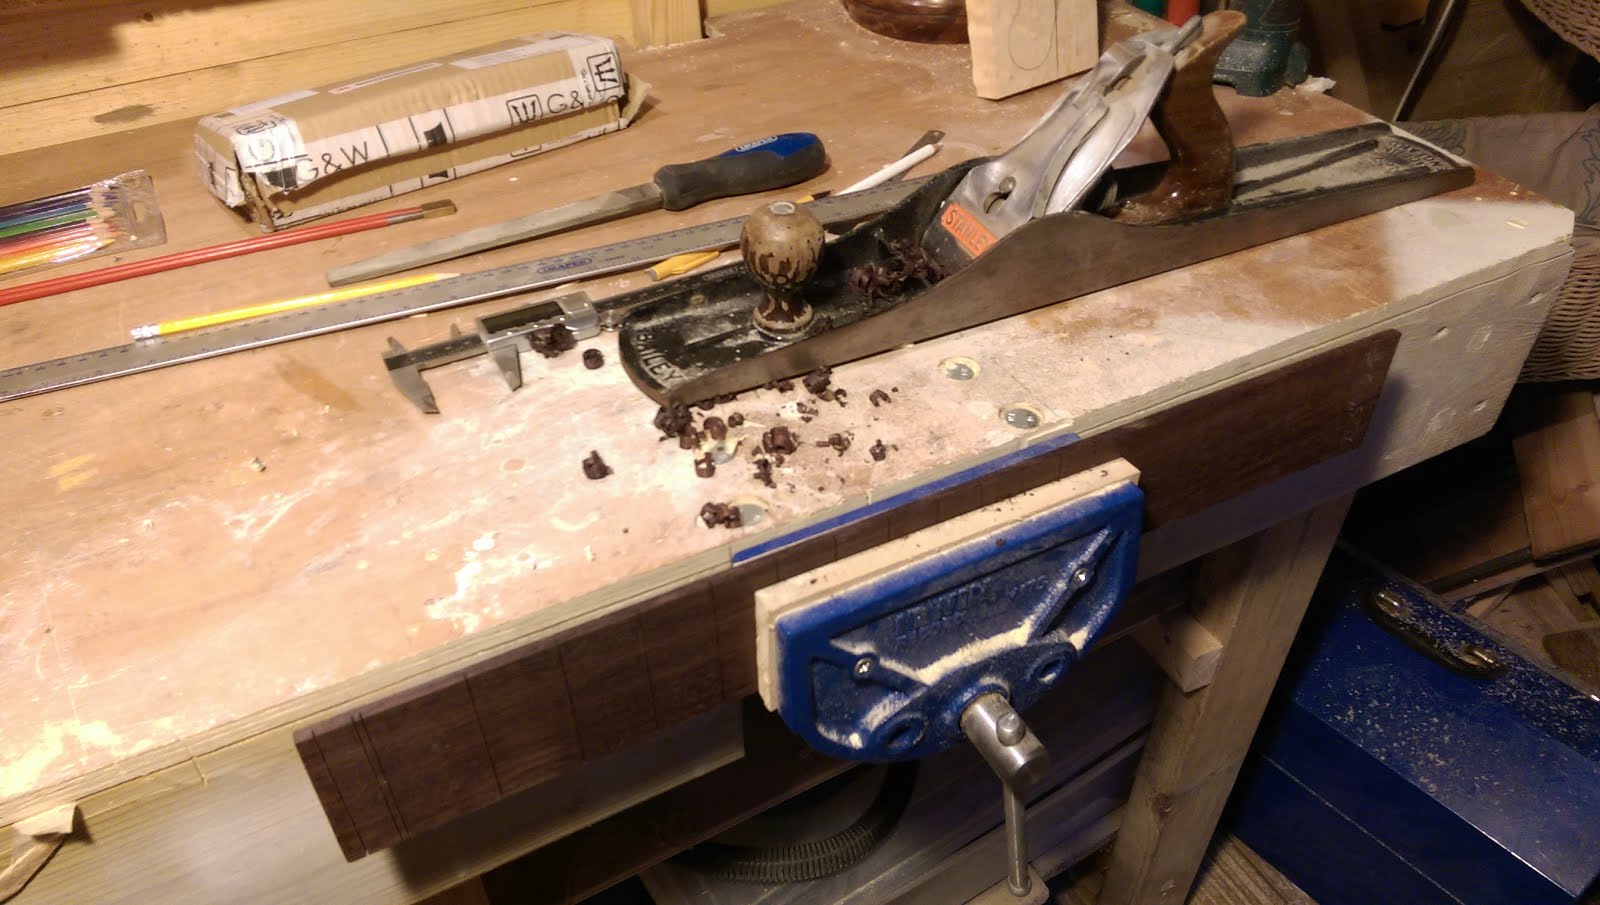
Now the fretboard bindings are planed down to get the a bit closer the surface of the board. I don't take them all the way down for the sake of prudence - If I nicked the surface of the fretboard with the plane at this point I think I'd cry. The last bit of excess height on the bindings will be removed with sandpaper and the radius board.

Start here:


And take thin shavings:


Until the side is near to flush:


I do this on both sides.

Next up is marking the position of the dots. I draw a centre line on the fretboard, and then draw diagonals between the ends of the fretslots. These three lines should intersect, and will show the centre of each fret:


The position of the dots was checked about 20 times, I know at some point I will drill holes for markers on the 6th, 8th, 10th, 13th frets... 

The positions are marked with a centre punch and drilled:


And the dots glued in with superglue:


And I continue down the fretboard:


And a close up:


The fingerboard is very close to complete - the fretting will come after it's attached to the neck. Ordinarily I would attach the fingerboard before the neck is shaped. This time I'm conscious that a lot of work has gone into preparing the fingerboard, so I may wait until the neck is at least roughly shaped before glueing it on - that way any mistakes in the neck won't mean the lose of the fretboard as well.  

All that remains is to sand the dots and the bindings flush, and to sand the fingerboard up through the grits.

Sunday, 3 January 2016

Telecaster build - fretboard binding

The next job towards finishing the fretboard is binding it. It's not a necessary step, but a nice touch since without it you can see the sides of the fretslots / fret wire on the outside of the fretboard.

I set up a pretty nasty router jig to cut a fine sliver off the side of the fretboard. I'm not proud of this, but it was safe and I figured that as this is a five minute job which I rarely do it wasn't worth making something too sophisticated :


From the side:


When the fretboard is run along the wall here, the router is set up to take about 1mm width, 2mm depth off the edge of it. I ran a few practices:


They looked ok, so I went for it, feeding the fretboard against the wall, past the router bit:


Yielding:


The end at the nut was tidied up with a chisel (which needs sharpening...):


And did a dry run to check it would be held in straight by the tape:


Before glueing up both sides of the fretboard with the rosewood binding:


And:


Next step is to trim the excess height of the binding strips down and sand the overhang on the sides back to the original width of the fretboard. Then I'll make and inlay the marker dots. 

Saturday, 2 January 2016

Telecaster build - neck blank complete

Time to radius the first fretboard. This is a 25.5" scale piece of AAA rosewood and will be given a 9.5" radius.

I checked the centre line, and did a last lot of measurements to make sure that it was square and straight on the neck blank. It was:


It was tape / super glued into the radiusing jig:


And the radius block prepared with 80 grit paper:


Threw some chalk on so I could get annoyed at just how slow the progress was:


Five minutes later:


Ten minutes later. You may notice that it doesn't look very different:


I've got a whole load of these progress pictures, but rather than show them all, here's the finished product after what felt like about 14 hours of sanding:  


You need to make sure that the fretboard remains straight along its length and also that the radius is 'even' on both sides of the centre line; i.e. that the height of the board is the same on both sides of the centre line at 10mm, 20mm etc distances from the centre. 

At this point, I decided to see exactly how badly the birdseye maple that this fretboard is going onto would work with the router. I did a test, and it actually routed ok, guess I was being over cautious:


I thought it was worth going for it for real so mounted up the template and cut it out:


I then temporarily attached the fretboad and routed that off the shape of the maple neck. However, I forgot to take any pictures, so there's only a shot of the neck completed:


And another:


And without the fretboard:


And the detail of the heel. A little router burn here but as the heel is marginally oversized at the minute, it can easily be sanded off without compromising a tight fit to the body:


And finally, here is the guitar as it currently stands:


Before I can mill away the back of the neck blank to its final thickness, I'd like to have the fretboard completely finished. 

The next jobs therefore will be to bind the sides of the fretboard and make and mount the dot inlays. The fretboard will then be sanded to its finished grit.

Thursday, 31 December 2015

Telecaster build - fretboard radiusing... it begins


My fretboard radiusing block arrived this morning. As far as I'm concerned, radiusing the fretboard using my method is the absolute worst job in guitar building. It takes forever, is boring, dusty and tiring. I've seen it done with a plane in a few minutes, but I just don't have the skill with that tool to be able to do it. I've also seen belt sander / router jigs to do the job, but I don't have the space to store them, or make enough guitars to make it worth building one.   

Aluminium 9.5" radius block, here it is:


The first job was to tidy up the block at the end of the neck. That done, and obviously only rough cut, with the fretboard in place it will look something like this:


And without the fretboard:


The first guitar is going to have a rosewood bound, rosewood fretboard. I suspect that the routing for the binding will have to wait until after the fretboard is at its final shape (and possibly attached to the neck) and I think I'd rather not do that until it's radiused. I'm going to think about the order of doing this over the next few days and may change my mind.

So, I put a straight edge on the fretboard


And clamped it into its final place on the neck blank. Lot of measuring and checking here which is easier to do before the neck has been rough cut out from the blank and into its final shape. The fretboard needs to be in the correct place (nut / 12th fret in the right place) and also exactly straight down the length of the neck. The fret slots obviously need to be at 90 degrees to the centre line on the blank. 


Once it's clamped, I drill two little pins through the fret slots. These will act as locating pins later on, so I know the fretboard is in the right place. The holes they leave will be covered up by the fret wire later on. 


Then I knocked up the jig I'll be using to radius the fretboard. It' just a simple straight edge which I can run the edge of the radius block along. This will ensure that the radius is put on in both the centre of the fretboard and in a straight line:


The fretboard will be attached to the base with glue / tape and so it will look something like this in use: 


That's it for now. 

Wednesday, 30 December 2015

Telecaster build - neck truss rod channel

This is a similar story to the previous truss rod installation. I'm using a different style truss rod, rather than the wheel adjuster it has the more traditional nut which sits in the heel of the guitar. It's still a double action rod, so the channel is simple to rout.

First things first - these come pretty grubby and corroded. I sanded and polished the adjustment nut on the dremel.

Sanded (and clamped in my nice new vice :]):


And polished with metal polish / rag wheel on the dremel:


Shiny. I gave it a quick dunk in lacquer to stop it corroding again and left it to dry:


Then the same story of sanding the face of the neck blank flat and smooth followed by planning a straight edge off it. 
I've not used birds eye maple before - I can see that the grain is going to be problematic. I don't think the surface of the maple that I bought had been put through a sander and there were a number of nicks in it. Some of these were quite deep and would have taken a lot of sanding to remove. Instead, I filled then with superglue and hit them with accelerator to cure quickly:


Then I sanded this back (you can see some of the marks in the surface in this picture. I didn't want to plane them all back with this crazy grain and it would have taken a lot to sand some of them out):


It looked pretty good. I usually wouldn't use this method as superglue tends to dry darker than the wood around it. In this case, given the grain I think it looks ok. Don't forget also that this surface will be under the fretboard, so I'm really only worried about the grain tears that are around the edge of the neck, where they might be visible at the interface between the fretboard and the neck. 

Then I planed an edge flat and 90 degrees from the finished face: 


The grain is tricky - that plane is sharp enough to shave hairs on my arm and you can still see tearout.

Set some stops for the router: 


And crept up on the required depth:


Still creeping:


Done:


Now, the heel end is trickier than with the heel style adjuster. I've seen two ways to fit this truss rod style on the internet. 
The first involves drilling a hole the same diameter as the adjustment rod into the end of the heel. This is probably the best method, but I currently lack the tooling / jigs to be able to drill that hole accurately enough. 
The second method involves routing a larger cutout for the adjustment nut, and gluing a plug in place to fill it up. Hopefully pictures will be more useful.

I rout out the area for the adjustment nut:


And drill a hole in an offcut for the adjustment hole:


This will be used to plug up the area on the end of the heel:


I forgot to take enough pictures, but basically that offcut is trimmed down until it fits snugly into the routed out area:


Then it's glued in place:


And once trimmed, the truss rod can be finally fitted:


The truss rod can currently be taken in and out - it will eventually be held in place by the pressure of the fretboard above it. 

I'm going to have to sort a way to shape this neck using a robosander / some other vertically mounted drum sander - I don't think that the router (usual method) or my planes (unless I can get them insanely sharp) will be good enough to avoid tearout on this grain. 

As with Telecaster Two, there's now nowhere to go apart from radiusing the fretboard. I'm still waiting on the fretboard radius block to come from Guitars and Wood (I think they've closed over Christmas) - at least there's still a legitimate excuse standing between me and having to do it :(